 This set includes enough parts to restore two speakers. This image is not<\/b> licensed under the Creative Commons license applied to text content and some other images posted to the wikiHow website. RCA was one of the top manufacturers of drive-in speakers, and if youre going to start collecting these units, youll run across brand names like Eprad, Ballantyne, Reed, Koropp, CBX, Projected Sound and others. Yep. And by that token, so too does the cable. Not sure the L-pad meets my requirement for a 1/4 or 3/8 diameter threaded mount with shaft to protrude outside the casing. This image may not be used by other entities without the express written consent of wikiHow, Inc.
\n<\/p>
\n<\/p><\/div>"}, {"smallUrl":"https:\/\/www.wikihow.com\/images\/thumb\/b\/ba\/Wire-a-Potentiometer-Step-6-Version-3.jpg\/v4-460px-Wire-a-Potentiometer-Step-6-Version-3.jpg","bigUrl":"\/images\/thumb\/b\/ba\/Wire-a-Potentiometer-Step-6-Version-3.jpg\/aid1555656-v4-728px-Wire-a-Potentiometer-Step-6-Version-3.jpg","smallWidth":460,"smallHeight":345,"bigWidth":728,"bigHeight":546,"licensing":"
\u00a9 2022 wikiHow, Inc. All rights reserved. Let me know if you only need individual parts from this group.
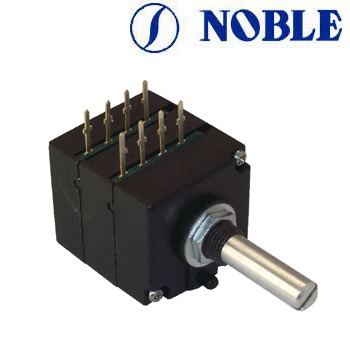
This image is not<\/b> licensed under the Creative Commons license applied to text content and some other images posted to the wikiHow website. 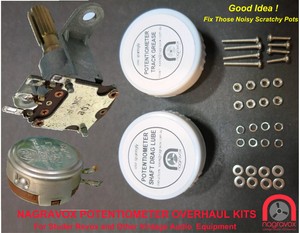 Its going back in the chassis, I can only do so much with this. It needs to be about 1 inch or 2 cm. On a guitar, this would mean wiring terminal 2 to the output jack. Electrician & Construction Professional, CN Coterie. How about we check it out from the front? Thats the volume control device. That little straight ridge lines up with a ridge on the speakers chassis. References. This change in resistance is then used to adjust some aspect of the electrical signal, such as the volume, gain, or power. NOTE; Sold out of GR-3 and don't know if I will ever find more.
This is where the final magic must occur. 14. The new one is on the right. Instead, I simply ordered a new potentiometer. Re: the need for a heatsink, get the speakers playing and monitor the heat buildup on the resistor, either with your finger or use a laser thermometer, which is much better than a burnt finger. wikiHow, Inc. is the copyright holder of this image under U.S. and international copyright laws. My entries for the 2022 Big E Photography Competition are. The prior photo shows a new base plate I was able to make out of a mending plate, So, what is the shaft length of the potentiometer you suggested? To ensure you can strip the wire cleanly, set your wire stripper to match the gauge of the wire. This is important. BTW Ohm is standard measurement of resistance as a speaker is basically a resistor (forming an electromagnetic coil which interacts with the permanent magnet on the back of the speaker according to the signal). You can use terminal 3 on the right if you want, but this means that youll need to turn the knob clockwise to turn the signal down. Your recently viewed items and featured recommendations, Select the department you want to search in, Decora Style Knob Slide Volume Control, 8ohms/70V, OSD 100W in Wall Volume Control Impedance Matching for Home Speakers, Rotary Knob White SVC100, OSD 100W in Wall Volume Control Impedance Matching for Home Speakers, Slider White VMS100, OSD 70V Mono 25W in-Wall Volume Control Unique Thru-Put Easy Daisy Chain Install (White, Almond, Bone) MVC25. Oh, I forgot to tell you. Plastic replacement it is. Amp source is 10 watts, so much lower than 100 watts. An additional source of drive-in speakers and parts: 2wlkf.png [ 44.66 KiB | Viewed 1923 times ], Eprad interior.JPG [ 184.32 KiB | Viewed 1906 times ], Drive-in movie speakers (need technical help), http://www.film-tech.com/warehouse/ware category=2, https://www.detroitdiecast.com/Default.asp, https://www.jameco.com/webapp/wcs/store llDownView. Youre going to get one channel of stereo sound. Thanks to all authors for creating a page that has been read 918,962 times. You should check the speaker wiring for shorts, as a short will certainly destroy the output stage. Trust me on this. If youre working on a breadboard, set the pot on the upper-most set of rows with the terminals facing you. Its got more holes in it than a perjurers alibi. Do you have any tips if I'm stripping a wire for the first time? I scrubbed the inside screen as much as I could, and maybe I took 10 years of dirt off it. Speaker has to be replaced. Youre seeing this ad based on the products relevance to your search query. Well, look at the difference a replacement RCA knob makes. This image may not be used by other entities without the express written consent of wikiHow, Inc.
\n<\/p>
\n<\/p><\/div>"}, {"smallUrl":"https:\/\/www.wikihow.com\/images\/thumb\/3\/30\/Wire-a-Potentiometer-Step-10.jpg\/v4-460px-Wire-a-Potentiometer-Step-10.jpg","bigUrl":"\/images\/thumb\/3\/30\/Wire-a-Potentiometer-Step-10.jpg\/aid1555656-v4-728px-Wire-a-Potentiometer-Step-10.jpg","smallWidth":460,"smallHeight":345,"bigWidth":728,"bigHeight":546,"licensing":"
\u00a9 2022 wikiHow, Inc. All rights reserved. 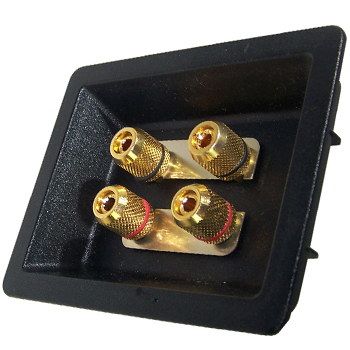 Bluetooth amplifier activated. And as you can see, it looks much better than the old red knob, IMHO. Different pots taper, or modify, signals differently. Chuck Miller now has a podcast on Spotify! This can be done by connecting the middle terminal to the amplifier input, terminal 1 or 3 to the ground, and the remaining terminal to the signal source. We may have one of that length. Hi Mehirenner, This image may not be used by other entities without the express written consent of wikiHow, Inc.
\n<\/p>
\n<\/p><\/div>"}, {"smallUrl":"https:\/\/www.wikihow.com\/images\/thumb\/e\/ea\/Wire-a-Potentiometer-Step-3-Version-3.jpg\/v4-460px-Wire-a-Potentiometer-Step-3-Version-3.jpg","bigUrl":"\/images\/thumb\/e\/ea\/Wire-a-Potentiometer-Step-3-Version-3.jpg\/aid1555656-v4-728px-Wire-a-Potentiometer-Step-3-Version-3.jpg","smallWidth":460,"smallHeight":345,"bigWidth":728,"bigHeight":546,"licensing":"
\u00a9 2022 wikiHow, Inc. All rights reserved. Yes, this was my field for many years. And look, the screws that are holding the speaker to the chassis those screws are flatheads, so four screws removed there, and two removed on either side of the potentiometer. If youre wiring an audio signal, you probably want to use a logarithmic pot. Henry's poetry and historical fiction blog, Tiffany A. This image is not<\/b> licensed under the Creative Commons license applied to text content and some other images posted to the wikiHow website. Archeology time. An L pad is a network composed of two impedances that typically resemble the letter capital "L" when drawn on a schematic. There are 8 references cited in this article, which can be found at the bottom of the page. Look, I could spend days trying to re-polish this knob, or I could just order a new plastic replacement. Tip: Turning the shaft all the way to the right will maximize the signal output as far as the pot allows. You dont want to get electrocuted or damage your device permanently. As you can see, though, this unit has seen a lot of double features. You know, the red knob. I then screwed the potentiometer into the chassis. I've worked at several drive-in theaters over the years and have serviced literally hundreds of drive in theater speakers, junction boxes, and amplifiers. Anyways, the speaker is in. Now I need to make sure that I take pictures of how the speaker is wired to the potentiometer, and how both are wired to the cable. But in the end, it will look incredible. % of people told us that this article helped them. It aint perfect, but its connected, and thats all that matters, right? Now I need to replace the potentiometer. These grilles werent manufactured with tiger stripes, those are years and years of dirt from the outside air bonding and darkening the grille. For a better experience, please enable JavaScript in your browser before proceeding. Hope it is a potential fix. Get an e-mail heads-up whenever theres a new Chuck Miller blog post, How to rebuild an old drive-in car speaker for moderntimes, Get an e-mail heads-up whenever theres a new Chuck Miller blogpost, Little Red Schoolhouse and Answers Please,1963-1989, Racism on the corner of Hopper and GeneseeStreets, And the Big E is cancelled for 2020ugh. A forum community dedicated to home theater owners and enthusiasts. Nopes. My desire is to wire them and place them in my theater lobby area playing the movie being shown in the theater next door. Sounds like a project! This image is not<\/b> licensed under the Creative Commons license applied to text content and some other images posted to the wikiHow website. Something like this. unlocking this expert answer. This way, nothing gets lost. On a guitar, this would mean wiring terminal 3 to the input jack. The 84th and "O" Drive In is long gone, and is now a retail area located about a mile from us. It is commonly used for attenuation and for impedance matching. See, instead of using flathead or Phillips head screwdrivers, these units used a couple of different theft-resistant screws to hold the unit together. Unlock premium answers by supporting wikiHow, https://fddrsn.net/pcomp/examples/potentiometers.html, https://www.bourns.com/pdfs/OnlinePotentiometerHandbook.pdf, (Wire a Potentiometer). Ill need to sand these again, but for now, they look rather good. The middle terminal is the potentiometers input. Take pictures now and refer to them later. Street Academy Harriet Gibbons High School. Ricardo Mitchell. Photo here is of drive-in movie speaker casing front with old potentiometer shaft length protruding to accommodate volume knob. 100K is the most common kind of potentiometer on the market, since it has a solid range for audio equipment. Go to YouTube and find a drive-in movie stinger, and play it through the BlackBerry. wikiHow, Inc. is the copyright holder of this image under U.S. and international copyright laws. Wolf Enterprises1011 N 79th StLincoln, NE 68505United Statesph: 402-770-4598enterprisingwolf@gmail.com. These screwdrivers can be found on the internet for about $12. What a terrific hobby. {"smallUrl":"https:\/\/www.wikihow.com\/images\/thumb\/a\/a3\/Wire-a-Potentiometer-Step-1-Version-3.jpg\/v4-460px-Wire-a-Potentiometer-Step-1-Version-3.jpg","bigUrl":"\/images\/thumb\/a\/a3\/Wire-a-Potentiometer-Step-1-Version-3.jpg\/aid1555656-v4-728px-Wire-a-Potentiometer-Step-1-Version-3.jpg","smallWidth":460,"smallHeight":345,"bigWidth":728,"bigHeight":546,"licensing":" \u00a9 2022 wikiHow, Inc. All rights reserved. Warning: Unplug your electronic device before opening any panels or soldering any connections. This image is not<\/b> licensed under the Creative Commons license applied to text content and some other images posted to the wikiHow website. HOLT Drive In Speaker, Specialty, Security SCREWDRIVER! Flowers' "I Read I Write I Blog" page, Tune In to Leadership, with Gret Thomas and Jewel Kinch-Thomas, Marc Beebe's "Wandering Words" photo blog, The Resurrected Camera, an argument for the affordability of film photography, "Off Her Chops" with Cassie Lee and Jessie McKay, Audley Stephenson's "Audacious Living" podcast. My speaker is a Pyle Hydra, 100 W peak power, 4 ohm. The ground is all the way off, terminal 2 is the switch itself, and terminal 3 is the switch turned all the way up. Potentiometers, or pots, are a type of resistor used to control the output signal on an electronic device, like a guitar, amplifier, or speaker. Screw it. I have no idea what ohm rating should be required. - The new potentiometer I purchased in prior photo will not work because of short shaft and I forgot what ohm rating it might be (Not knowing what I really need). See attached photo. Search online or take you pot to an electronics store to see what options are available for your make and model. The original inside parts were totally rusted and beyond identification or function. These numbers are always printed directly on to a pot. To run the speakers from a stereo amplifier, the transformer must be disconnected, and each speaker must be connected to each output channel of the amplifier. If the voltmeter registers a signal from your pot but the device doesnt work when you turn your electronic on, then theres an issue with the connections you soldered. The drawing agrees with what I was suggesting. This image may not be used by other entities without the express written consent of wikiHow, Inc. \u00a9 2022 wikiHow, Inc. All rights reserved. This image is not<\/b> licensed under the Creative Commons license applied to text content and some other images posted to the wikiHow website. This article was co-authored by Ricardo Mitchell and by wikiHow staff writer, Eric McClure. . This way, the pot will always keep the amplifier input somewhat connected to ground - no voltage surges will occur, and no separate bleeding resistor needed. If you are stuck on still getting a potentiometer, please take a look at CT3023-ND, click here. By signing up you are agreeing to receive emails according to our privacy policy. We use cookies to provide our visitors with an optimal site experience. Right post to cable, check. I dropped the new knob into the housing, then added the potentiometer controls. Come join the discussion about home audio/video, TVs, projectors, screens, receivers, speakers, projects, DIYs, product reviews, accessories, classifieds, and more! Why did NONE of you tell me about how good Abbott Elementarywas? The case is missing one of its three screws. This image may not be used by other entities without the express written consent of wikiHow, Inc. \u00a9 2022 wikiHow, Inc. All rights reserved. https://www.google.com/search?q=speaker+l-pad. I just realized the Wiki snippet shows a L Pad for an antenna connection. All rights reserved. By using our site, you agree to our. Company. Hey, remember that scratched-up volume knob? A speaker L pad is a special configuration of rheostats used to control volume while maintaining a constant load impedance on the output of the audio amplifier. And what do you know, it fits inside perfectly. The resistance of each speaker should be at least 10 ohms or more, depending upon the setting of the volume control. In some places, you might open these units and find that the speakers were wrapped in plastic bags, to keep ants from crawling up into the mechanism and chewing on the wires. A penetrant like 3M156305-ND may help. wikiHow, Inc. is the copyright holder of this image under U.S. and international copyright laws. We've got the tips you need. This is a vintage RCA car speaker. New Do It Yourself Drive-In Speaker Restoration Kit. Left post to negative speaker post, check. To install and wire a pot, youll need to ground the first terminal, feed the input signal into the third terminal, and then run an output signal through the terminal in the middle. RCA Circ-Lite Drive In Speaker Junction Box TERMINAL BLOCK. The impedance of the primary of the transformer is a deliberate mismatch to the output of the amplifier, and with an entire field of transformers in parallel, each pair of speakers would get a fraction of the total output of the amplifier. Great, I am thankful it may meet my requirement! And these knobs come in different colors I could get a red knob, or a black knob, or a chrome-plated knob. Something that might be, shall we say, well built. Last Updated: December 19, 2021 And this unit is unique in that, as a design feature, it sends the speaker cable out of the hanging part of the chassis, rather than from the side. Basically the pot being mounted flush, it will extend 1 outwards. LIVE: AVSForum Tech Talk Podcast with Scott Wilkinson, Episode 7 Click here for details. Time to boost up my photography goals. Yes, that is correct! Most times, the internal speakers on these units are ripped and rotted. I am attempting to restore an old drive-in movie speaker. But I think that for me, Im going to use these skills and maybe make one more set of Bluetooth-enabled drive-in speakers. I figured if Im going to buy this screwdriver, Im going to also replace the old Holt screws with new Holt screws. Other times, the speakers are remarkably in decent shape. And if you want to replace your screws with flatheads or Phillips heads, thats your call. Now all I need to do is wire up the insides. Expert Interview. Okay, now to thread the cable through the back end of the chassis, and connect the chassis shell together with the Holt screws. Now as for the original speaker nah, its toast. A potentiometer is almost always used to throttle an input signal so that it can be adjusted.
\n<\/p>
\n<\/p><\/div>"}, {"smallUrl":"https:\/\/www.wikihow.com\/images\/thumb\/e\/eb\/Wire-a-Potentiometer-Step-4-Version-3.jpg\/v4-460px-Wire-a-Potentiometer-Step-4-Version-3.jpg","bigUrl":"\/images\/thumb\/e\/eb\/Wire-a-Potentiometer-Step-4-Version-3.jpg\/aid1555656-v4-728px-Wire-a-Potentiometer-Step-4-Version-3.jpg","smallWidth":460,"smallHeight":345,"bigWidth":728,"bigHeight":546,"licensing":"
\n<\/p>
\n<\/p><\/div>"}, {"smallUrl":"https:\/\/www.wikihow.com\/images\/thumb\/9\/9e\/Wire-a-Potentiometer-Step-2-Version-3.jpg\/v4-460px-Wire-a-Potentiometer-Step-2-Version-3.jpg","bigUrl":"\/images\/thumb\/9\/9e\/Wire-a-Potentiometer-Step-2-Version-3.jpg\/aid1555656-v4-728px-Wire-a-Potentiometer-Step-2-Version-3.jpg","smallWidth":460,"smallHeight":345,"bigWidth":728,"bigHeight":546,"licensing":"