Select Multi-Camera and then the name of the camera. Thats where multicams come in. Keeping your projects organized in Premiere Pro is often a vital part of the editing process. When you are ready for that, right-click into the viewer, and change the display mode to multicam. Copy and paste your clips in, leaving your existing organization intact. Thats not to say you should never use merged clips.  Or you can simply blade the clip and then right-click that portion of the clip to select the camera to be shown. For that we need to use the multi-camera monitor and/or embed this sequence in another timeline. Right now, the Multi-camera tool has been activated, but it is not showing as it should be.
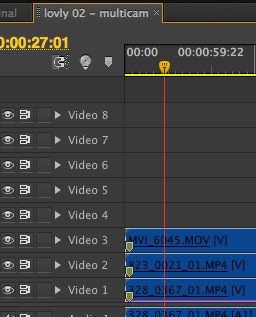
(I call them multicam sequences, because the term is shorter.).
 Create a sync point for each clip, unless you are syncing usingtimecode or audio.
After spending 6 years in the post-production studio, Mihai decided to share his insights on video editing and computers. To adjust your cuts, use the Rolling Edit tool. Required fields are marked *. Select all clips and nest them together in one group. Right-click one of them and select Create Multi-Camera Source Sequence. Check the next video to see exactly how to do it! He lives in South West England. This timeline view is useful for certain tasks such as applying effects to a particular camera view. It should work. If you're not fortunate enough to be working with that level of organization in the footage you've received or shot, then make sure you differentiate your camera footage as best as you can to prevent confusion later on. Select those clips on the timeline and create a nest. Premiere Pro calls these multi-camera sequences, because this is a special sequence that contains more than one clip. Importantly, although it looks similar to a normal timeline, it behaves quite differently. Add a clip marker to this point in each clip.
Subscribe to Larry's FREE weekly newsletter and save 10%on your first purchase.
document.getElementById( "ak_js_1" ).setAttribute( "value", ( new Date() ).getTime() ); Edit smarter with Larrys latest training, all available in our store. This is both a very non-standard and very innovative way of using multicam clips. If you don't have such a reference point, look for something like a clear sudden movement or sound that appears in all clips.
Given the fact that it is real-time editing, you will not be able to do it perfectly from this first try. 
Your email address will not be published. To switch between cameras, play the sequence and click the desired camera angle.
You can also just clap your hands to achieve the same effect. You can edit at least 3X the number of clips using proxies than camera native media.
Edit the multicam sequence into the timeline. Finally, go ahead and add any effects you want, such as color correction, music, or transitions to the video sequencedo it as you would with any standard sequence in Premiere Pro. 2018-2022 Thalo LLC. Go ahead and switch back and forth between the camera angles until you achieve your desired result. There are several ways to load and edit the multi-camera sequence: What's happening here? Another option, though not as desirable, is to record individual microphone signals onto different cameras. In the Program monitor, click the Wrench and choose. But I also love having access to my sequences in the timeline AND in the preview monitor at the same time. Watch the video or keep scrolling to read the transcript! To change angles, either click the camera image in the Multi-camera Monitor, or type. This will allow the editor to mark a common in-point. You have a bin containing the original footage that was contained inside of the multicam, along with all of the other video clips from that day of filming.
Find out how you can easily create multi-camera sequences in Premiere Pro.
So I will typically match-frame the source until I get back to the original audio that I intend to use, and then overwrite the multicam clips audio with the original on this working timeline. Now, import the XML file into Premiere Pro. With merged clips, you can combine one video source, and as many audio sources as you want. Once that's all decided, click OK. After some time, Premiere will deliver a selection of multi-camera sequences for you to use! When you stop playback you'll see cuts in the timeline where you changed cameras. Well, merged clips effectively make brand new clips in your bin, and in doing so Premiere strips out of some of this information. Well, it depends entirely on your workflow. Usage is subject to. There is one finicky thing you should be aware of with multicams. If you are an editor who is working by yourself in a vacuum, and you dont plan to do any turnovers to sound, color or VFX, then merged clips will probably work just fine for you. Does that make sense? So the next item on the checklist is modifying the synced clips after youve created them. You will be presented with several options for sync, based on timecode, audio, or marked points. If you have footage from multiple cameras covering the same events, you have the option to "sync" clips within a multi-camera sequence. Note: As the rushes areonly availableas one video file, they have been individually cut into video files for syncing for the purpose of demonstration. Once you have all the clips you want to create multi-camera sequences out of, select them all, right-click, and selectCreate Multi-Camera Source Sequence. To do this, simply click on its icon or press the keyboard shortcut Shift+0.. Multi-camera sequences aren't necessarily the best choice in all cases. If you're logging your clips (which you should be doing), you can also create sub-clips from your multi-camera sequences that will retain the ability to switch between cameras. This is a point at which all the camera clips are at exactly the same moment in time, so they will be in sync with each other. If you're making a video with multiple cameras, however, not only will you now have to log and prepare more footage, but you will also need to have that footage synced, sorted, and ready to roll. If you use markers, all markers used to indicate a sync point must have the same name, though they need not be the first marker in the clip.
Once you create a merged clip, you are unable to modify it. (What you are actually doing is editing a sequence into another sequence.). The big issue Im facing: when i insert into the timeline, i like to keep nesting *off* so I can access all the audio channels upon insert.
One of the easiest ways to maintain your project structure is to create a "syncing bin" solely for syncing clips inside. The quickest way to do this is to right-click the multi-camera source sequence in the project panel and select. I cant find how to do this anywhere! This article will examine some of the ways to streamline your multi-camera project. To open a multicam sequence for editing, right-click the sequence in the Project panel and select: Double-click to load the multicam sequence into the Source monitor. That short film or social media ad will stand no chance in front of Premiere`s multicamera tool. With a single camera shoot, sorting and cataloging your footage is a fairly straightforward process. This may seem confusing and unnecessarily complex, but it does actually make sense and in the end it gives you much more control and flexibility. This is especially true if you work on non-narrative projects where you might be discovering what video clips sync to which audio clips as you go along. Thats easy with multicams because you can Match Frame from the timeline to the source, Match Frame from the multicam source to the original video source and then right click and choose Reveal in Project. The first thing to do is organize your camera angle clips and set a common sync point for each of them. As a result, it's highly advised that you create any multi-camera sequences before you start logging to avoid doubling up. Remember, to apply any effect to a particular camera view, go back to the source sequence (pictured in step 2 above) so you can work with the original camera clips rather than having to apply effects to every single edited segment. This includes documentaries, commercials, and corporate video. A multi-camera sequence is treated much like any other sequence or piece of footage. Premiere Pro is my primary NLE these days and its multi-camera editing routines are a joy to use. If your clips are broken into consecutive recordings with stops and starts in-between, then each recorded set will appear further down on the same timeline. And that brings us to another very important editing tool.
In layman's terms, this is a sequence containing more than one piece of footage, all accessible as a single reference "file" in your project window. Since you are working within an NLE, you can also make these camera angle cuts at a slower or faster pace and, of course, trim the cuts for greater timing precision.
Syncing on audio requires all clips have the same audio recorded on them, which rules out using this technique to sync still images. The program monitor is split into two halvesthe left half shows the individual camera clips while the right half shows the output.
You might often do this when exporting video files for VFX vendors to make sure that youre pulling from the original source footage to send out. All content is Copyright MediaCollege.com except where stated otherwise. Im away from my editing system for another week, due to my move, so I dont have an immediate answer. Launch Autosequence and set the matching frame rate for your media. The rushes packages from Camera A and Camera B for SceneOne will be used as working examples. They offer the kind of flexibility needed to keep projects organized and able to scale up as they progress. Join our newsletter for tech tips, reviews, free ebooks, and exclusive deals! The timeline will update to show these on-the-fly edits when you stop playback. To quickly set up the multi-camera tool you have to follow these simple steps: Synchronize the cameras with the Premieres sync tool, select all your camera clips, right-click on them and go to Synchronize. Theres no clap and no common timecode.
This is exceedingly useful for a multi-camera editing workflow.
In theory, once you've set up your sequences you can perform the entire edit in real time by playing the sequence and switching cameras as you watch. The default shortcut key for Match Frame in Premiere is F..
This is especially useful for situations such as live event coverage when you have several cameras showing different shots of the action, crowd, cutaways, etc. Once you've worked with multicam sequences for a while you'll get to know if it's worth using them or not for any given job. First separate all of your clips into separate folders on your media hard drive A-CAM, B-CAM, SOUND, and so on. Sync the video by slipping the clips positions on the tracks. Easy right? Ideally, your production crew should use a Lockit Sync Box to generate timecode and sync to all cameras and any external sound recorder. (Avoid using a ripple trim to prevent jumps in the action or audio.). In addition to synchronization, you obviously need to record high-quality audio. This will import the source media into bins, along with a sequence of clips where each camera is on a separate track. If you prefer, you could add a more descriptive name for your markers to make sure you use the correct one, e.g. Of these, matching frame rate is the most important. Save my name, email, and website in this browser for the next time I comment. For instance, you might need to quickly find the bin of footage from that day of filming as you are hunting down a clip that you need. Add transitions such as dissolves. This cookbook is designed to provide a checklist to quickly create, view and edit multicam sequences in Adobe Premiere Pro CC. This is especially important if you want to use the powerful multicam camera switching tools in Premiere to pick the camera angle you want to view, and even cut between them during live playback. For us, multicams are the clear winner. This piece of metadata is great for helping software like Premiere and DaVinci Resolve successfully relink from transcoded media, like what you might edit with, to the full resolution camera masters, that you might use for color grading. Is there anything you recommend based on what I wrote? The heart of the multi-camera system is the multi-camera source sequence. Multicams can combine as many video and audio sources as you want.
Most commonly, this is used when syncing via the use of a clapperboard, at the point by which the top of the board hits the bottom. The best-known reference is a clapper board which provides both a visual and an audio point. You can only create multi-camera sequences out of clips that sit in the same bin, which can be a bit of a headache for those trying to keep their projects organized and tidy as described above. But if you are often collaborating with many different departments in post production, youll want to develop a workflow that doesnt remove important metadata from clips and allows you the most flexibility to adapt and change things as you go. If you have theInsert and Overwrite Sequences as Nest or Individual Clips toggle enabled in the timeline, any multi-camera sequences will revert to the individualclips, playing over each other in sync like so. If you are using double-system sound you can choose whether or not to include the camera sound. Now you are the proud owner of this new information on how to use multicamera in Adobe Premiere Pro.
However it is not how you will be editing the final product. You might have no idea what a multicam is, and thats okay because youre going to learn all about what makes them so great, and how they compare to the merge clips feature. In the timeline you can change the camera view withe the right-click menu. You can also create multicam clips without going through the aforementioned process. In your timeline, hover your playhead over a clip. Heres a video tutorial on how to create a replace edit: https://larryjordan.com/articles/premiere-pro-how-to-create-3-point-back-time-replace-edits-v/, Your email address will not be published. Or, lets say you want to change from camera angle 1 to camera angle 2. NOTE: The speed of your storage will determine how many clips you can edit at once. Multicams are the clear winner in this category, as they will preserve all of your important metadata and are completely non-destructive in your workflow. You have an option of syncing via In and Out Points, Timecode, and Audio. When you double-click a multi-camera source sequence it opens in the source monitor instead of the timeline. When you use Match Frame to load a merged clip into your source monitor, you have all of the same great tools at your disposal. Select all elements to combine into the sequence in the, Create a multi-camera source sequence. There is a trade-off between the hassle of setting them up versus the speed and usability gains once they're set up. This creates a new multicam sequence in the project panel that looks similar to a normal timeline sequence (pictured right). So you can indeed use Match Frame on both merged clips and on multicams, however if you need even more functionality within Premiere, multicams will let you take Match Frame one step further and reveal the actual source footage. Create a new (normal) sequence and place the multi-camera source sequence in it. There are several ways to do this: For this tutorial we'll use clip markers, as it's an easy method that can always be used. So I usually copy all content from multicam sync and paste into a blank sequence. If you arent using it right now, heres a quick demonstration. Of course, that only works if the production crew has supplied quality audio to all cameras and external recorders. Premiere Pro has a built-in system for dealing with multi-camera shoots, i.e. For example, lets say that none of the three sync methods exist. How about if you want to replace a source clip or two in that multi-cam sequence? To create a multi-camera sequence, a selection of samplefootage kindly donated from Cinestudywill be used.
To synchronize multicam clips in Premiere Pro, simply select the matching sources in the browser/bin, right-click, and choose Create New Multi-Camera Source Sequence. That will only work with professional products, not DSLRs.
Create a free website or blog at WordPress.com. Related:Adobe Premiere Rush vs. Adobe Premiere Pro: Which Should You Use? While in play, use the numeric keyboard keys to edit the video in real-time.
Match Frame is a vital tool in your editing arsenal.
But this precludes the use of match/find frame it sends me back to the raw clip (without the synced audio). How it works is really easy: number 1 will bring in view camera 1, number 2 will bring in view camera 2, and so on. One of the most crucial choices isSynchronize Point. If synchronization is successful, youll then end up with a multicam source clip that you can now cut to a standard sequence. If you look closely inside the timeline, you will see that Premiere Pro has automatically cut and replaced the new camera angles for each timecode you selected.
However, if you for some reason needed to get back to the ORIGINAL footage that was used to create that merged clip, you wouldnt be able to very easily. This can be a mixer feed or direct mic input to one or all of the camera tracks, or to a separate external audio recorder. However, if you have this disabled, your clip will be presented as a single clip, like you would see with a nested sequence. Well, the good news is that they work just like any regular clip in your timeline. How do multicams work in your timeline compared to merged clips? The first is tape name or reel name. You may have seen this term on the Relinking Offline Media screen. The way to tackle this is to edit these cameras to separate video tracks of a new sequence. After editing, to replace one shot with another, put the timeline playhead in the shot you want to change and click the image of the new shot in the Multi-camera Monitor. This means if you were filming with one camera and multiple audio sources, such as a boom microphone, a lavalier, and the on-camera audio, you can combine all of that audio together with one source of video. Become a member of our Video Training Library today!
There are workarounds to make this process work, however we strongly suggest you skip merged clips altogether because multicams will retain that important information for you all the way through your edit. It seems to me as I havent done this personally that you should be able to open the multicam clip, then do a replace edit to insert the new clip in place of the old one. Over the years, a lot of the projects that Ive edited have been based on real-person interviews. As I mentioned, this allows me to be able to open sequence in preview and then open in timeline. To avoid this, ensure that your rushes are in clearly labeled bins. Syncing by In and Out Points allows you to use your manually-set points on your source monitor as the points to line up your footage. If you edit with a multicam in your timeline and you should happen to unlink the audio from the video, Premiere can get a little bit confused about what those audio clips are, since they are technically still a multicam, but they are also just a nested sequence. Video editing has never been this simple and easy! And voila! Select the tool from the toolbar (or press N to activate the rolling edit), then grab the cut and roll it to the desired timecode in the sequence. Feel free to check my other Premiere Pro tutorials out. Then import each folder of clips separately.
As the cost of camera gear has come down and DSLRs became capable of delivering quality video, interview-based production now almost always utilizes multiple cameras.
While having a specific multicam feature in your NLE isnt required for cutting these types of productions, it sure speeds up the process. So, if you change your mind and switch to a different angle, the effects and corrections do not change with it. The worst thing you can do with multi-camera edits is to mix up footage from multiple cameras in your project. In our case we've used a single unnamed marker in each clip. Remember than any effects or color corrections you apply in the timeline are applicable to that visible angle, but do not follow it. I usually dont worry too much about changing camera angles, until I have the story fleshed out. So if you made a mistake, and maybe misaligned the audio and the video, or accidentally used the wrong track from the audio recording and want to swap it out, that wont be possible without actually re-creating the entire merged clip. If you are working on a short film or a social media ad that has multiple camera angles for the same scene and you need to find how to use multi-camera in Adobe Premiere Pro, you are in the right place!
Add transitions, or effects, and polish as necessary. Match Frame. Under the best of circumstances, you can play the sequence in real-time and cut between camera angles in the multicam viewer, much like a director calls camera switches in a live telecast. The new camera angle will be selected with a red border and appear in the output view. Now, lets talk about how this pertains to merged clips and multicams. Best of all, if you want to change to a different camera angle without affecting your edit, you can simply load your multi-camera sequence back into your source monitor and change your view. Multicams win this category, and thats because not only can you use multicams to sync one source of footage and audio, its also possible to actually adjust your multicam AFTER youve created it. document.getElementById( "ak_js_2" ).setAttribute( "value", ( new Date() ).getTime() ); Want to see what you'll be getting? A single multicam sequence can contain video, audio, and/or stills.
If all of your footage is carrying sound recorded during your shoot, Premiere Pro can analyze the waveforms and sync them up if there's a matchit's pretty cool! This provides a way to view all camera angles at the same time and switch between them (kind of like doing a live camera mix). In our case we'll use Clip Marker. You can grab them and move them, you can unlink or link the audio from the video, you can scale and position them, apply effects, stack them, draw a little car with them, whatever you want to do. Creating a multicam sequence is simple if you follow these instructions. You can cut a clip into your timeline, drag just the video or just the audio and change the In and Out points. This will likely be an obvious visual or audio reference that can easily be seen or heard in all clips. To open it in a timeline instead, right-click the sequence in the project panel and select. document.getElementById( "ak_js_1" ).setAttribute( "value", ( new Date() ).getTime() ); How To Use Adobe Premiere Pro The Basics, How To Use Shopify Ultimate Guide By Shopify Experts, How To Use Adobe Premiere Pro Complete Guide. Directors will typically record these sections with two or more cameras at various tangents to the subject, which makes it easy to edit for content without visible jump-cuts (hopefully). If performance is an issue, transcode the clips into proxies. You can sync using a common: Syncing on audio is the slowest, timecode is the easiest and my preference is using clapper slates and Ins, because I never have the gear on set to send matching timecode to all cameras. At this point, you can only imagine the power this tool provides. To use Autosequence, your clips must have matching timecode. So, there you have itthis should take away the complexity of working with footage from multiple cameras. And that brings up the next point, and thats how metadata is preserved and used when you create merged clips or multicams. Alternatively you can switch the audio along with the camera video.
Fortunately Match Frame works great with both merged clips and multicams but with caveats.
When Im ready to deliver the final product, I will dupe the sequence and clean it up. Larry, could you duplicate a multicam sequence and flatten one copy of it, keeping the other unflattened in reserve in case the client asks for changes down the road? Sometimes if you have a short and simple job, it may be quicker to edit using traditional timeline techniques.
Typically you'll want to: There are numerous keyboard shortcuts associated with multicamera work.
Right-click on the nested sequence, go to Multi-camera and select Enable. So once you make a multicam, you can choose to Open in Timeline, and this will allow you to see the contents of the multicam, and modify them as needed. Its basically like a brand new clip in your bin, and you cant change it. Yes we know, organizing your footage can be tedious. To turn this sequence into one with multicam clips, just follow my explanation for working with a manual process, described above. This is it! Longtime fan first time caller. Multicams or Merge Clips in Premiere Pro: Which is Best.