 (Yup, even residual debris can interfere with your dip mani's shiny finish!). #10. Yes, brush contamination takes away your shine! Too much Finish Gel can flood the eponychium and cause lifting as soon as nails grow out. Brush comes into contact with Activator #3. Saturate a larger cotton ball with Acetone and remove any excess products. Keep in mind that the fewer strokes you use, the shinier the top coat will appear. You don't have to spend What do you do in case of a nail emergency? 2b. Excess powder on the nails will consolidate on the brush and over time, harden the brush and the Base Gel liquid. Current email address may be undeliverable, Text SAVE15 to 72559 for alerts & 15% off an online order, Fast-acting Formula without burning sensation.
  3a. #12. Its thick consistency may trap air if not applied using the right brush technique. Saturate a larger cotton ball with Acetone and remove any excess products. If you haven't already, get to know more dip lovers atDipWell's Dipper Clubwhere they're always sharing their top coat hacks. Move the dipping powder jar towards the client's nails. Create your designs then apply Activator #3. Dried excess powder can cause the nails to look splotchy or bubbly. 2. Use a dotting tool or crystal katana to pick up your gems. #4. 2a. 2a. Remember to properly cleanse and sanitize yours and the clients hands and nails before starting the services. Allow 5-10 minutes to soak.
 How do you add embellishments like jewels so they stay put and wherein the process is it done? HI, Sign up to receive promotions, exclusive offers and new products. Make sure your nails are 100% dry before applying the Sealer. 1a. Subscribe to receive tips & tricks, exclusive deals, & more! (For more info, check our guide forThe Best Environment For Your Dip Mani.). Take note that ridges, waves, or bumps issues usually happen when you're a little too generous when applying the Activator. Let's summarize these common topcoatissues that are preventing you from achieving a shiny mani. And don't forget to share the snapshots of your shiny manis with us on Instagram via@dipwellnailsor our official hashtag #DoYouDipWell.
2.
Take great precaution to not file too much around the eponychium.
To prevent brush from hardening, allow Activator #3 to dry for 20 seconds. #14. 1a. Quick movements can cause powder to consolidate on one spot. Keep in mind the longer you soak the brushes in the Brush Softener, the better the result. Now you know the 411, let's talk about how to get a shiny mani and keep your top coat in tip-top condition. Keep in mind that the fewer strokes you use, the shinier the top coat will appear.
Ethyl Acetate, Pentanone, Dimethyltolyamine. Selected quantity exceeds what is currently available. SHOP 20% OFF SITE-WIDE | USE CODE: SAVE20. The second coat gives the shine. Remove the foil. #8. 1b. This will let you see products available for purchase online and pickup at your selected store. if your email address is correct or enter a new one. For best shine, allow product to air dry for 2 minutes without fans. QC,
 Excessively slow application of Base Gel can cause part of the nail to dry before getting dipped, resulting in uneven surfaces. Since these dip liquids are extremely sensitive to temperature and humidity, you may need to play around with the timing a bit to figure out what works best for you. A word of warning: Activator and Sealer are time-dependent of each other, so make sure you give the Activator enough time to dry before applying the Sealer. 2b. Next, apply the Sealer starting only from the cuticle end of the nail to the tip of the nail. Share the Sealer love(and this guide)with the dippers in your life. Odor-free, fast-acting formula without the burning sensation. Do not allow clients to help with the dipping process.
 After filing and shaping, apply Activator #3 on all 10 fingers. Apply just the right amount of Activator, DIP DILEMMA:Ridgy, wavy, or slightly lumpy dip nails. 4.
 The matted top coat is due to the dip blend still being wet underneath. When applying the Finish Gel, why is the result not shiny? How do I prevent this? The motion of pressing too hard will cause this. 2a. The product image/packaging shown may not be an exact representation of the product. 2. Please go over the step-by-step for proper applications. Excessively thick application of Base Gel can cause Base Gel to move when dipping causing some areas to be thicker than others.
  Just check the box below to access the site: Make sure that JavaScript and cookies are enabled in your browser, or check if any browser plugins are preventing them from loading. When this occurs, be sure to allow more time for the Activator to dry before applying the Sealer. Ensure proper maintenance of bottle and stem cleaning. Sally Beauty does not share or sell personal info.
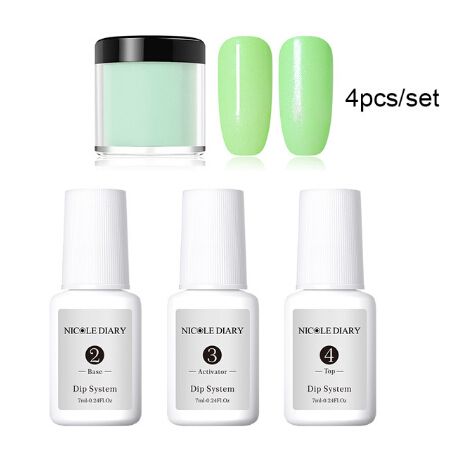
Make sure to wipe off excess powder with soft brush after each dip. Why Does the entire stem of the brush in the liquid bottle come off the cap? #2. Using Coarse Drill bit of choice; reduce the bulk on each nail by approximately 70%. 1b. Failure to close Base Gel liquid bottle. If the Activator isn't completely dry before you seal it, you may also end up with a stiff Sealer brush. 1. Then allow for it to activate and fully dry as well. Activator. It gives your dip mani a glass-like shine, It protects your dip nails from the sun's harmful UV rays, It helps encapsulate nail art for long-lasting designs, Activator - allow 3 to 5 minutes for nails to dry, Sealer - allow 2 to 3 minutes for nails to dry.
Any excess cuticles on the natural nail will cause lifting. The first coat seals and protects. Apply Step 3 Gel Activator to the finished nail after Step 2 Base and Top coat is applied. Leave a hairline around the eponychium when applying the Finish Gel.

 AK, If the bristles are still hard and not separate, place back into Brush Restorer for additional 5-10 minutes. Sine, Licensed Cosmetologist and DipWell's Community Educator, further explains: 2. Finish Gel may be applied too thin or unevenly. But don't wait too long. Place the cotton onto the nail and wrap the finger securely with foil. Saturate the cotton with 100% Acetone (Nail Product Remover.) Place the cotton onto the nail and wrap the finger securely with foil.
  Our bottles have gone through numerous testing and are specially designed to ensure quality liquids. How do I clean my brushes so that I don't pull out the brushes completely? It's also super important to wipe clean the brush before putting it in the Brush Softener so that it has less product to break down. #6. Wind can cause Finish Gel to frost over, have dull look, or wrinkle. Why do liquid brushes get harden?
 And how do you make sure you get a shiny mani every single time? Link to Privacy Policy & Terms of Service. For proper technique, the first coat of Finish Gel should be thin; the second coat of Finish Gel can be slightly thicker. All previously products (such as Polish, Gel, Hard Gel, Acrylic, Dipping Powder) need to be completely removed prior to applications to ensure that there will be no lifting, pocket lifting, or infections. 2b. 2a. For jewels, after you file and buff, apply a dot of Base Gel #2 where ever you want to apply your gems.

 Psst! Why do the nails lift after a few days after the application?
  Base Gel has a fairly quick dry time of less than 10 seconds thus quick movement is necessary for even coverage. Why am I not able to open the Liquid #2 Base Gel cap after a few uses?
  For best practice, use a cotton ball saturated with Acetone and remove excess gel after each client. As you dip, keep the clients fingers at 45 degrees angles pointing downward to help powder be looser. #3. Apply 2 coats of Finish Gel #4 (1st coat on 10 fingers and then reapply 2nd coat on 10 fingers). Excess filing will cause unevenness around the cuticles. Wait for it to air dry then apply Finish Gel #4 twice. 1a. Why does my application look splotchy and uneven?
  2. 1a.
  We do not recommend filling as it easily exposes your clients to infections as its almost impossible to remove all of the lifts with colored dipping powder. Simple taps will not be enough to remove the powder properly. Simple taps will not be enough to remove the powder properly. If you are using real Swarovski, thenthey also recommend applying the top coat around the stones.
  Thank you, your email has been submitted. First, use a fluffy brush to dust off any excess powder between layers of dipping. Look at question 1 and 2 for troubleshooting Finish Gel. 3b.
 However, it is necessary to close the neck of the bottle of the way to prevent air from coming in, yet allow for easy opening. Saturate the cotton with 100% Acetone (Nail Product Remover.)
 Use a dry lint free wipe to remove excess product.
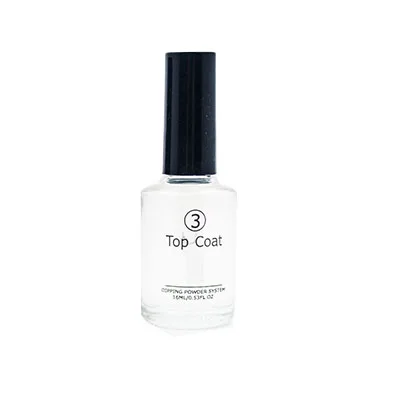
 Two coats of Finish Gel are needed in order for nails to be shiny. Apply the top coat in thin, fast, and long strokes, DIP DILEMMA: Bubbles appearing onthedip mani. 2. Any excess moisture on natural nails will also cause lifting.
Also, be mindful of not trapping any air bubbles as you are moving the brush in and out of the bottle. To prevent lifting, a fine sanding band should be used to remove any excess products near the skin. 1a. Why when using generic bottles to refill with NuGenesis liquid refill does the liquid stick to the bottle? The email address entered may be incorrect or incomplete. No matter whatdo NOT clean the brushes with acetone!
Removing your dip nails at home can be quick and easy. Don't skimp on the all-important step in our easy acrylic dip system:Step 4. Worst, inserting the brush that has Activator back in the Sealer bottle can cause cross-contamination and may change the top coat consistency. Do not pull on the brushes. The neck of the bottles are getting clogged and when it grabs onto the step of the brush, it will come off.
 In a nutshell, here are the results that the Sealer delivers: But how does it exactly work? Keep the room temperature between 68 to 72 F and below 40% humidity.
  NuGenesis reserves the right to change product images, labels, and specifications at any time without notice. Closing the Base Gel liquid all the way is not necessary as this will make it hard to open the bottle. Sealerthe resin that serves as the top coat or finishing touch that secures all your dip liquids and dip powders together. Copyright 2022 NuGenesis Nails | All Rights Reserved. After removing brush from Brush Restorer, use a dry lint-free wipe to clean the bristles and place back into the bottle.
 1c. Their jewel designs generally last for 3 weeks at least. Brushes should be placed into the Brush Restorer for at least 15 minutes before wiping. 1a.
 You may need to allow extra time for your nails to dry before applying the second coat of Activator.
  Make sure your hands and nails are 100% dry after washing them during prep and when you finish filing and shaping. 1. Excess powder on the nails will consolidate on the brush and over time, harden the brush. For proper prep, use a fine sanding band to remove shine and cuticles from nail bed. If the second coat was applied too thick or was over-brushed, you can get weird lines with matte spots. Allow 20-30 minutes to soak. 1b. Some problems with the Sealer application are due to wet nails that are not completely free of filing debris. Terms of Service.
 Failure to wipe off excess product before activating.
Any time the brush comes into contact with wet Activator, it will immediately get harden. 3.
 #13. In order for the dip powder top coat for dip nails to do its job well, it needs a sidekick: Step 3. 3a. 2a. If you're a human and not a robot, don't worry! Once activated, the product becomes dries within seconds. 1.
 Want super shiny dip nails? Work one nail at a time for maximum results. If you use your Brush Softener often and have broken down lots of products over time, then it may be time to replace your Brush Softener. If you are experiencing bubbles, this may be a result of applying the Sealer in short, overlapping strokes. (Bubbles occur when the brush is picked up or placed down on the middle of the nail.).
 1b. For special shapes such as Coffin, Ballerina, Almond, Stiletto, etc, the nails need to be well shaped before and after the dipping process. After each dip, excess powder need to be removed with a soft brush. 2a.
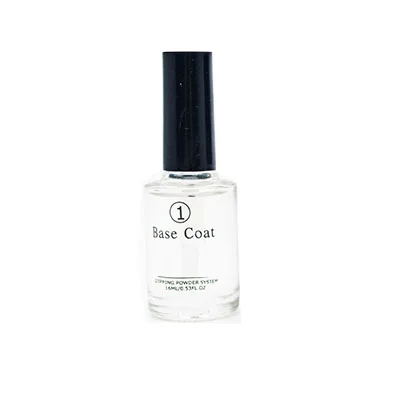
  Prep #1 should be use to balance the PH level on the nails and dehydrate the nails prior to applying Base Gel #2. If hand file, use 180 grits buffer/files to remove shine and cuticles from nail bed.
I consent to DipWells Privacy Policy &
Proper prep is extremely important for lasting wear.
 One technique from our educator is to go directly on top of the gems asthey find thatthis makes the gems look shinier and last longer. Your Sealer may get cross-contamination from the previously applied liquid or even residual dip powder or filing debris. Once that's all dry, you may proceed with the Sealer.
  2. Please check
 This occurs most often with application of Finish Gel. Longer drying times may be necessary in humid climates. But ifyou used the Brush Softener and didn't wipe it off prior to replacing it in the bottle, it can cause a problem. FREE SHIPPING ON ALL ORDERS OVER $100 USD. Waiting to file the shape after the dipping process will expose the side walls. This dynamic duo works in tandem to cause a chemical reaction that ultimately gives you that shiny finish on your dip mani. You can also use a lint-free wipe to rub off any excess Activator that may still be on the surface of the nail.
 Sometimes quickly wiping your nails with alcohol or acetone can help make them shiny. 1a. Use dry lint-free wipe to wipe off excess. Nugenesis Easy Dip Nail technology is designed without the use of any UV light. Failure to apply the Activator #3 before applying Finish Gel. If the Activator or Sealer isn't fully dry even after 5 minutes, it could be because of the moisture trapped within the layers of dip powder and liquids. Otherwise, the Sealer won't have anything to react to. Generic bottles will leave too much product on the brush and too much air gets in and the product will harden. After each dip, excess powder needs to be removed with a soft brush. The process is completely self-drying with proper use.
  Sealer is a strong adhesive. You can use the brush from the Brush Softener to apply the Sealer instead. 1a. Keep in mind; more thin coats are better than few thick coats. First coat of Finish Gel was applied excessively thick. Too much hand sanitizing may leave you with dry hands.
  Excess products left on the eponychium and surround kin can contribute to lifting. Activator #3 is used to accelerate the drying process, thus without it, the Finish Gel will not dry. We're sorry, this product cannot ship to the following locations: Use NuGenesis bottles when refilling from the larger bottles. The splotchy white spots occur when the Sealer gets in contact with water.