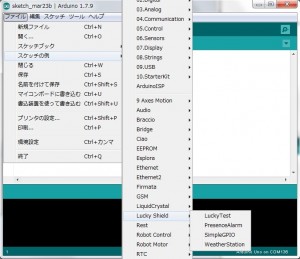
braccio I've recently received an early sample of Radxa ROCK5 Model B (aka ROCK 5B) SBC part of the "Developer Edition" batch with 16GB RAM, and already showed the hardware and it booting successfully in Debian 11. After an initial period of familiarisation, I found the. If not, the motor is turned in the appropriate direction. There are so many factors that affect the arm and the primary element that needs to be masters of the arm is the stepper motor. A tinkerer. MPUteapot is a program that needs to be used for this process. Another aspect of the design is that it's quite time consuming to take the arm apart and reassemble. https://store.arduino.cc/usa/tinkerkit-braccio. on Arduino Braccio++ robotic arm is designed for high-school and university students. 
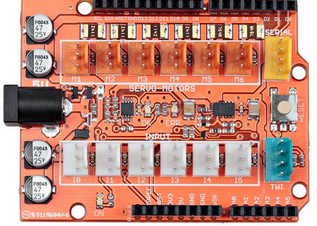
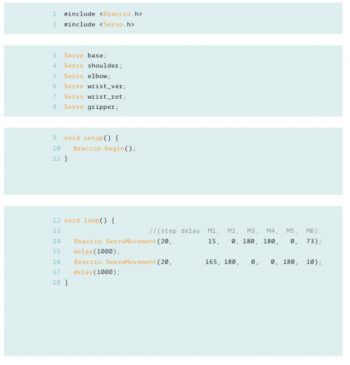
 Braccio.ServoMovement(20, 0, servo2, 180, 170, 0, 73); else if (realservo >=3000 && realservo < 3180){. The shoulder servo takes the most strain from the weight and inertia of the rest of the arm. The values of the com port and bandwidth needs to be edited as per the settings in Arduino. There are 4 watchers for this library. Axis 2 It helps the lower arm of a robot to move in an up and down motion. The following video is the result of my experimentation with MPU6050. lilypad The video of testing can be found below at the end of page. The robot arm links are manufactured from reasonably robust plastic. It has 7 star(s) with 5 fork(s). This language of the programming had to be followed when the braccio shield is used. This website uses cookies to improve your experience while you navigate through the website. By continuing you indicate that you have read and agree to our Terms of service and Privacy policy, by stefangs C++ Version: v1.0 License: Apache-2.0, by stefangs C++ Version: v1.0 License: Apache-2.0. One of the things I wanted to learn about was describing the kinematics of the robot. I used a pencil and scribbled over the paper on both sides. It comes with a 5V 4A DC switching power supply (wall-wart), and a pretty good circuit design for powering the servos independently from the arduino. What was the large green yellow thing streaking across the sky? We also use third-party cookies that help us analyze and understand how you use this website. The following video is by Arduino and watching the video gives a clear idea how the machine is built. The following is the calibration code and as shown the value 20 refers to the speed of the arm movement and then the following values are the angles of the servo. My aim for this week is to explore a little into the world of robotics as I am completely new to it. I have an Arduino UNO and have uploaded StandardFirmata on it. float voltage = sensorValue * (5.0 / 1023.0); double gyroYrate = -((double)gy / 100.0); double gyroZrate = -((double)gz / 100.0); // Braccio.ServoMovement(0, gyroZangle, gyroYangle/2, gyroYangle, gyroYangle/2, gyroXangle, 10); //Braccio.ServoMovement(15, gyroZangle, gyroYangle/2, gyroYangle, gyroYangle/2, gyroXangle, 73); //Braccio.ServoMovement(15, gyroZangle, gyroYangle/2, gyroYangle, gyroYangle/2, gyroXangle, 10); Robotics is something that completely new to me. I found this pretty hard, and had to dust off mathematics I hadn't thought about since the 1980's. arduino braccio onboarding hubspot developer kubernetes gke formatar documentos programas portas folga aumentando amlogic memobox s905 tinkerkit drm lushdollar gabster The working of the flex is quite simple. For more information about this library please visit us at The shoulder servo takes the most strain from the weight and inertia of the rest of the arm. This makes changes and repairs a bit annoying. By Edgewall Software However the downside of the design is that the servo shaft directly bears all the forces put on the joint. If it's LOW, the servos won't respond. The shaft of the servo. - Design and produce something with a digital fabrication process (incorporating computer-aided design and manufacturing) not covered in another assignment, documenting the requirements that your assignment meets, and including everything necessary to reproduce it. arduino braccio robot tinkerkit gemerkt Currently covering the most popular Java, JavaScript and Python libraries. Has anyone already faced something like this? Below is the code for the Dashboard and next for Adverts. https://www.arduino.cc/en/Guide/Braccio. To watch the graphical interface of the movement we have to use Processing. Article contributed by RS Components (click for original). The DH results (see figure below) are I confess still counter intuitive to me, but they modelled and animated fine in Matlab. The above link was really really useful in helping me understand how to make it possible. Find centralized, trusted content and collaborate around the technologies you use most. On the whole, the week filled with the learning process. It is still very basic: Keep using the Braccio shield BUT set pin 12 as a digital OUTPUT then set it HIGH. I didn't make much progress with this by hand, but found that using the "Robotics Toolbox for Matlab R10" code from the Peter Corke book, I was able to derive the DH parameters using the DHFactor() function. I used the same code but modified the code to suit the braccio shield. This is very important as this is the resistive material that is used to measure the resistance. It also comes with a quick startup guide, and the following link is the pdf of the same. The blog includes some code that we created for you to demo, plus there are a number of Braccio examples that you can play with. In this case, everything is 90 except the last as it is the gripper value. The main objective of this week is to experiment with any process that involves digital process like laser cutting, CNC milling, 3d printing etc. Check this short video that explains how a MEMS gyroscope works. Lesser General Public License for more details. After an initial period of familiarisation, I found the Braccio V2 library by Lukas Severinghaus more useful that the standard library. arduino-library-braccio-robot has no bugs, it has no vulnerabilities, it has a Permissive License and it has low support. https://www.hackster.io/KureBasRobotics/gesture-controlled-trainable-arduino-robot-arm-via-bluetooth-4a1e57. The new robotic arm provides an upgrade to the Tinkerkit Braccio robot and has been designed to assist in teaching real-world manufacturing techniques,topics such as physics and robotics, and concepts like motions, forces, torque, gear ratio, stability, and weight of payload. The original Tinkerkit Braccio robot is sold out in the US but discounted on the European store for 159,20. Plus, if you loved Meccano as a child, this may just bring back some fond, childhood memories for you. This library is free software; you can redistribute it and/or, modify it under the terms of the GNU Lesser General Public, License as published by the Free Software Foundation; either. The motor is attached by gears to the control wheel. This appears to be to do with "soft-starting" the servos but, as far as I can see, it just sits there pulsing pin 12 HIGH/LOW for 2 to 6 sends, then sets it HIGH.
By clicking Post Your Answer, you agree to our terms of service, privacy policy and cookie policy. Bangalore? It wouldn't have been possible without the help of a friend in the lab Kishan Chavda. Axis 1 It is located at the base of a robot, and helps it to rotate from left to right. This part is basically sandwiching all the materials and packing them. I was able to control the arm using the gyro sensor but was not able to control the gripper. There is a particular way to connect the sensor and the diagram for the same. Should I try to connect the servos directly on Arduino without the shield? arduino The [shopping] and [shop] tags are being burninated. The MPU 6050 is a sensor based on MEMS (micro electro mechanical systems) technology. Junior employee has made really slow progress. Braccio.ServoMovement(20, 0, 15, 180, 170, servo5, 73); else if (realservo >=6000 && realservo < 6180){. the joint of the robot arm, there are no seperate bearings or shafts to take the strain. Neil spoke about composites in detail. initiation circulaire redohm pilotage For that reason I don't think this has something to do with the shield, but I also found no indication of this issue on firmata's library. with the green Two-Wire Interface (TWI / I2C) port, but got around this by connecting directly to the SCL and SDA pins rather than using the green connector. This is caused as a result of the inertia of the moving fork. The MPU 6050 is a 6 DOF (degrees of freedom) or a six-axis IMU sensor, which means that it gives six values as output: three values from the accelerometer and three from the gyroscope. As the motor rotates, the potentiometer's resistance changes, so the control circuit can precisely regulate how much movement there is and in which direction. The monitor will satrt displaying values form the sensor. Also, the underlying Arduino UNO is not very powerful compared to more modern MCU's. This is different as post to the usual Arduino code as we would usually define the servo and have to write the servo. Thanks for contributing an answer to Stack Overflow! Arduino says the new robotic arm is made of recycled and eco-friendly materials with the plastic parts using Ecoallene, instead of the ABS plastics. So I had to remove the paper and make it darker. Directions I'm heading next in my explorations are: I'll write these up as seperate projects (see https://www.hackster.io/rpatterson/gobilda-robot-arm-mechanical-design-3051ac).
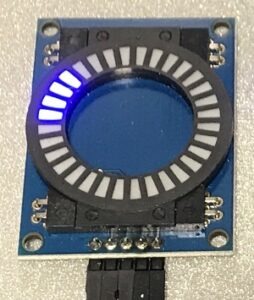
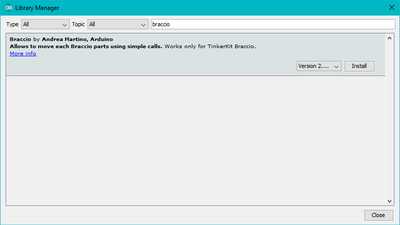
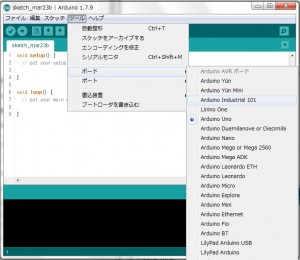
The next part was to fix the jumper to each of the copper strips. All the above six axes are controlled with the help of servo motors. Inside there is a pretty simple set-up: a small DC motor, potentiometer, and a control circuit. The first step is to measure the size desired(size of your finger) and then cut the plastic, paper and copper in that size. arduino-library-braccio-robot has 0 bugs and 1 code smells. How gamebreaking is this magic item that can reduce casting times? Since my instructor, Rudrapal was kind enough to lend me his robot arm I was able to experiment with it. Braccio library has to be installed on Arduino to run the machine with the shield. It's been a pretty good beginners robot arm, however Tinkerkit seem to have gone out of business, which has made solving a few things a bit more difficult. This test is to check the movement of the sensor in MPU6050. The Braccio Tinkerkit is a low cost and great fun way to get started in robotics. function. The wall that the ball collides with creates tiny piezoelectric currents. -Understood the working of stepper motors, -Understood the working of a 6 Axis robot arm, -Learned how to calibrate and control the arm, -Controlled the working of the arm with different methods, -Programmed the arm to respond to wireless and wired commands. Axis 4 This axis is known as wrist roll, and it rotates the upper arm of a robot in a circular movement. Now I had to change the previously written code slightly to accommodate the flex sensor and to control the gripper. You should have received a copy of the GNU Lesser General Public It is held in place using piezoelectric crystals. How can we determine if there is actual encryption and what type of encryption on messaging apps? The design uses fairly fool-proof plastic connector from each arm link directly to the servo spline (see figure below). The DH results (see figure below) are I confess still counter intuitive to me, but they modelled and animated fine in Matlab. The Following is the pinout configuration to connect MPU6050 to Arduino. A couple of limitations with the board came up after a while. What's in store for the future of household robots? Code complexity directly impacts maintainability of the code. What Autonomous Recording Units (ARU) allow on-board compression? What is the probability of getting a number of length 62 digits that is divisible by 7 and its reverse is divisible by 7 also. Imagine a cuboidal box with a small ball inside it, like in the picture above. Braccio.ServoMovement(20, 0, 15, 180, servo4, 0, 73); else if (realservo >=5000 && realservo < 5180){. Learning about the arm was quite nice but programming it to do task wasn't very easy as I am new to programming. Foundation, Inc., 51 Franklin St, Fifth Floor, Boston, MA 02110-1301 USA. The library offers easy access to the data from the onboard TinkerKit Braccio, and provides moves for the Braccio. The plastic strip is just to bring the sensor back to upright position when bent. Is there a word that means "relax", but with negative connotations? The documentation was a bit scarce. Braccio.ServoMovement(20, 90, 90, 90, 90, 90, 73); Once the calibration was done I ran a few examples codes to see the working of the machine. This chip uses I2C (inter-integrated circuit) protocol for communication. Which is nice in terms of weight distribution. The challenge is to modify the code that would suit our needs. Braccio.ServoMovement(20, 0, 15, 180, 170, 0, servo6); pulse_wide = map(angle, 0, 180, MIN_PULSE_WIDTH, MAX_PULSE_WIDTH); analog_value = int(float(pulse_wide) / 1000000 * FREQUENCY * 4096); To explain one loop of the servo, the value is first defined within a range like in case of servo 2 its 2000 to 2180 and then mapped. It was really amazing to watch the machine move and perform a task. Necessary cookies are absolutely essential for the website to function properly. braccio : The main objective of this week is to control the arm in multiple ways. arduino robot arm tinkerkit braccio bras robotic components rs robotis 3d robotique electronics diy parts canette outils meubles autre technologie The above details explain what the robot arm is made of and by understand the principle and the placement of the servo motor, the arm can be controlled accordingly. How do people live in bunkers & not go crazy with boredom? Braccio is 6 axes robotic arm from Arduino itself. The links of the manipulator can be considered to form a kinematic chain. Reviews, tutorials and the latest news about embedded systems, IoT, open-source hardware, SBC's, microcontrollers, processors, and more. Which lead should I buy for my DC power supply? Depending on the current produced from the piezoelectric walls, we can determine the direction of inclination and its magnitude. But opting out of some of these cookies may affect your browsing experience. The terminus of the kinematic chain of the manipulator is called the end effector and it is analogous to the human hand. Now moving on to Processing. Its hard to know what the normal (i.e 0* position )of the motor. -flex sensor is sensors that change in resistance depending on the amount of bend on the sensor. I can't get it to work. arduino-library-braccio-robot code analysis shows 0 unresolved vulnerabilities. As there are different kinds of composites he explained about the safety of each. I found the, videos really useful, and eventually bought a copy of ", However, I found calculating Denavit-Hartenberg (DH) parameters very difficult. So as suggested by my regional instructor Ohad, I decided to make a flex sensor to control the gripper. The links of such a manipulator are connected by joints allowing either rotational motion (such as in an articulated robot) or translational (linear) displacement. library by Lukas Severinghaus more useful that the standard library. Get full pictogram instructions and give yourself an extra hand at DesignSpark: https://www.rs-online.com/designspark/build-and-program-a-braccio-robot, Panasonic PhotoMOS Photovoltaic MOSFET High-Power Drivers, A selection of Robotics articles for further reading, United States of America Huntington Convention Center of Cleveland, Ohio, Malasia Malaysia International Trade and Exhibition Centre, United Kingdom Coventry Building Society Arena, Coventry.